What is Best Free Image Converter?
Best Free Image Converter is a
very useful tool for image conversion, capable of batch converting the file format of images, supporting more than
50 formats including BITMAP, JPG, PNG, TIF, GIF, PCX, TGA, ICO, PSD, JP2,
DCX, PDF, etc.
Best Free Image Converter is capable of changing image attributes, such as color, quality, brightness, contrast, DPI, etc.
Best Free Image Converter is capable of
adjusting image size on scale or according to input value, and of rotating images.
Best Free Image Converter is capable of
adding custom watermarks to images and setting its size, location and transparency. It supports
watermark file formats of BMP, JPG, PNG, TIF, GIF, PCX, TGA, ICO, PSD, JP2, DCX, and also supports transparent layer.
When setting parameters of conversion, users can preview the converted images or source images, capable of WYSIWYG.
Supported File Formats
TIFF Bitmap (*.tif; *.tiff; *.fax; *.g3n; *.g3f ; *.xif)
Compuserve Bitmap (*.gif)
JPEG Bitmap (*.jpg; *.jpeg; *.jpe; *.jif).jif)
Paint Brush (*.pcx)
Windows Bitmap (*.bmp; *.dib; *.rle).rle)
Windows Icon (*.ico)
Windows Cursor (*.cur).cur)
Portable Network Graphics (*.png)
Photoshop PSD Image (*.psd)
Windows Metafile (*.wmf)
Enhanced Windows Metafile (*.emf)
Targa Bitmap (*.tga; *.targa; *.vda; *.icb; *.vst; *.pix)
Portable Pixmap, GrayMap, BitMap (*.pxm;
*.ppm; *.pgm; *.pbm)
Wireless Bitmap (*.wbmp)
JPEG2000 (*.jp2).jp2)
JPEG2000 Code Stream (*.j2k; *.jpc; *.j 2c ) 2c )
Multipage Pcx (*.dcx)
Camera Raw (*.crw; *.cr2; *.nef; *.raw; *.pef; *.raf; *.x 3f ; *.bay; *.orf; *.sre; *.mrw; *.dcr)
DICOM Medical Image (*.dicom;*.dcm;*.dic;*.v2)
High Efficiency Image File (*.heic;*.heif;*.heics;*.avcs;*.heifs)
WebP (*.webp)
Microsoft HD Photo
(*.wdp;*.hdp;*.jxr)
DirectDraw Surface (*.dds)
ImageMagick SVG Renderer (*.msvg)
Scalable Vector Graphics (*.svg;*.svgz)
Joint Bi-level Image Experts Group Interchange Format (*.bie)
Cineon Image File (*.cin)
High Dynamic Range File (*.exr)
Multi-face Font Package (*.dfont)
DPX 2.0 Image (*.dpx)
Flexible Image Transport System (*.fits;*.fts)
Joint Bi-level Image Experts Group Format (*.jbig;*.jbg)
JPEG Network Graphics (*.jng)
MATLAB Level 5 Image Format (*.mat)
Magick Image File Format (*.miff)
Multiple-Image Network Graphics (*.mng)
ImageMagick SVG Renderer (*.msvg)
Embrid Embroidery Format (*.pes)
Photo CD Image (*.pcd;*.pcds)
Printer Control Language (*.pcl)
Continuous Acquisition and Life-cycle Support Image (*.cals)
Pyramid Encoded TIFF (*.ptif)
GIMP image (*.xcf)
Microsoft XML Paper Specification (*.xps)
AV1 Image File (*.avif)|*.avif (If it cannot be
displayed, please install Microsoft
AV1 Video Extension)
How to use Best Free Image Converter?
Just 3 steps!
Step 1: Add Source Files.
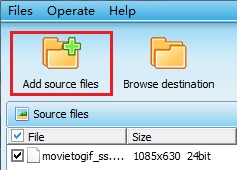
Click the button in the tool bar of "Add Source Files", select the image files to be converted, or directly drag the image files from folder to the source file list.
Step 2: Set conversion Options and preview conversion effects.
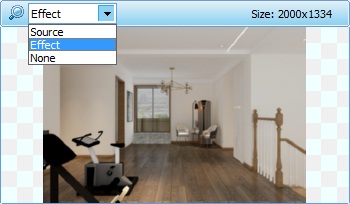
Select an image in the source file list, and the image will be displayed in the preview area on the right side of the interface. You can choose "Source", "Effect", or "None". When the preview image is "Effect", set any option to display the conversion effect immediately.
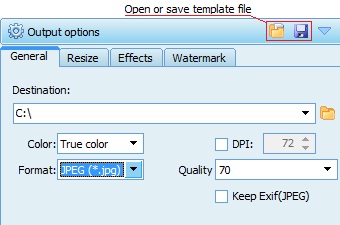
Select the folder of converted images to be saved in.
Select the color of the output image: There are 8 color options, such as Black & White, Gray, and True color, to realize the conversion from color image to black and white, gray image. It is recommended to choose "True color" for general color pictures.
DPI setting: If you want the output picture to have a specific DPI value, check the "DPI" item and set the DPI value. If "DPI" is not checked, the software will output according to the DPI value of the source image. Note: The higher the DPI value, the clearer the picture will be when printing. For example, printing a picture requires 300 or more values, which will be clearer. The average network picture is 72.
Select the output image format: 14 output formats are provided, including PDF, PS, DCX, TIFF, which can combine multiple images and output them into one file. JPEG, PNG, JPEG2000 and other compressible graphics formats can compress images according to their own needs. Note that the more compressed images, the smaller the file size, but the worse the image quality.
You can also select "original format" as the output format. For example, if the source file is PNG format, the converted format is also PNG format. If the source file format is not within the 14 output formats, it will be uniformly converted to JPEG
format.
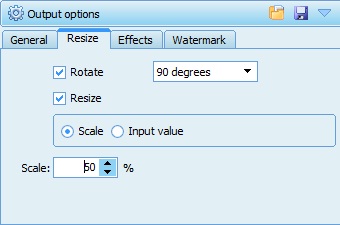
Resize or rotate the images if needed. You can select the sub-option of "Scale" or "Input Value" under the option of "Resize".
You can also rotate the picture 90, 180, and 270 degrees, and mirror it horizontally or vertically.
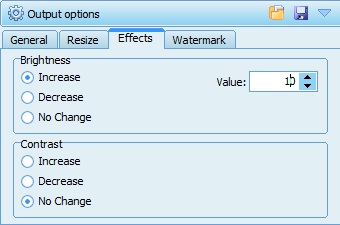
Change the brightness and contrast of images. Users can select the
sub-option of “Increase” or “Decrease” under option of “Brightness” or “Contrast”, then input the value as desired.
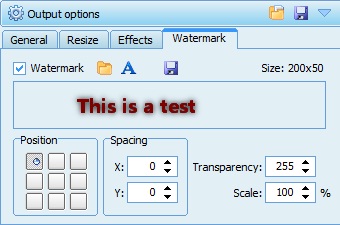
Set watermark and adjust its size, location and transparency. If the watermark is too small compared to the source image, it can not be seen when previewed. When this happens, user should adjust the size of watermark, or reselect another watermark.
Step 3: Start Convert.

Click the “Start Convert” button.